viernes, 11 de noviembre de 2011

Waterbomb De Superficie Poliédrica Con Cuadrados Regulares


La base del patrón Waterbomb se combina con una serie de cuadrados regulares, creando un modelo tridimensional flexible y curvado. Si el largo del patrón se extiende la superficie curvada se incrementa.

Base clásica waterbomb
Base clásica waterbomb combinada con una serie de cuadrados regulares

Teselación waterbomb de cuadrados regulares colapsado y expandido con curva.

Iso-área de la teselación waterbomb de cuadrados regulares colapsados y expandido plano.

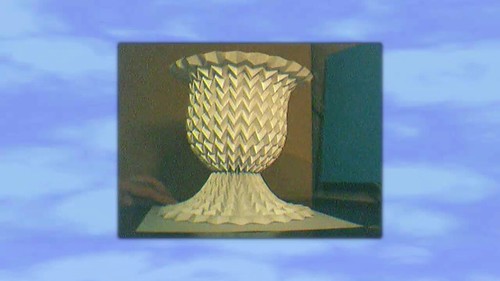
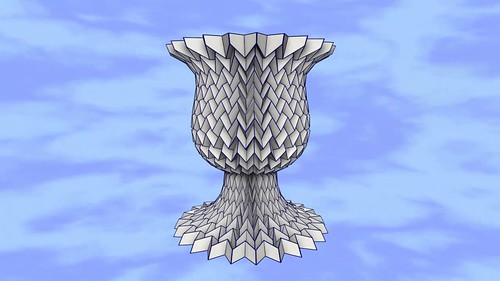
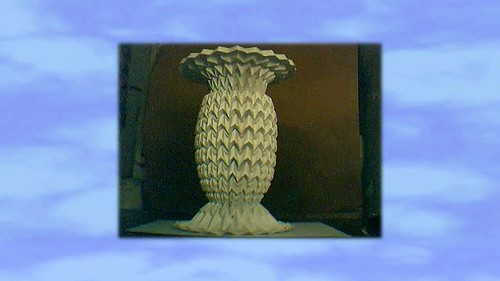
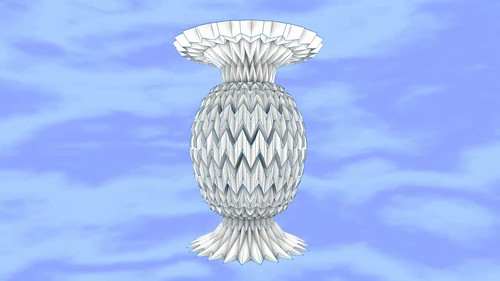
Como resultado de las tensiones residuales en los pliegues, la teselación waterbomb con cuadrados regulares al plegarse adquiere forma cilíndrica sobre los ejes con mínima energía de pliegue, la auto-tensión hace que sea biestable en las dos direcciones ortogonales

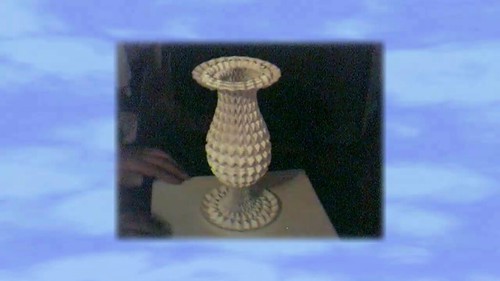
Para mejores resultados usar un papel relativamente rigido. A continuación se muestra una cuadricula de 8 x 8 al final se mostrara una cuadricula de 16 * 16.


Se debe preparar el papel, todo el doblez en valle se pliega como muestra el patrón de pliegue, este representa la base waterbomb. La mejor forma de hacerlo es dar vuelta al papel y después crear los pliegues de montaña.

Iniciar en la parte posterior del papel por una de las esquinas y seguir el colapso a lo largo de los nuevos pliegues

Se ve ligeramente el doblez de todos los pliegues, por lo que adquiere una ligera forma tridimensional.


Volver a las esquinas y empezar a colapsar las bases waterbomb, juntándolas con mas fuerza. Esta acción requiere mantener las secciones dobladas juntas, mientras se pliega el resto.


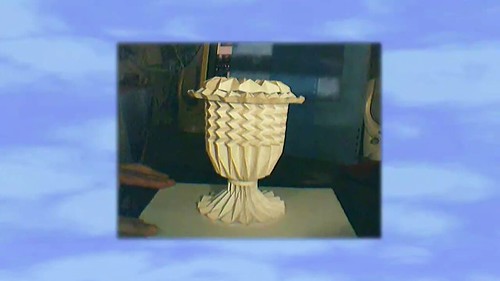
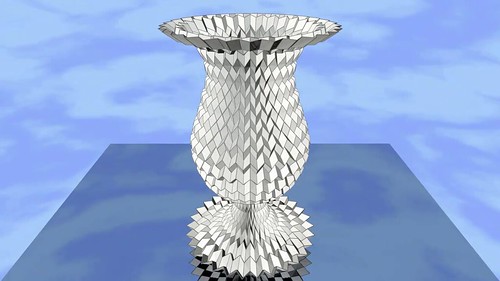
Colocar el modelo de teselados sobre una superficie plana. Aplicando tensión se obliga a reducir la curva. Sostener el papel a los extremos y empujar para juntar el patrón. Pellizcar los pliegues verticales uno por uno, para reforzar  lo pliegues ya preparados y dar al papel memoria de forma.

Se puede utilizar clips de papel u otro tipo de pinzas adecuadas para mantener el patrón plegado durante el proceso.


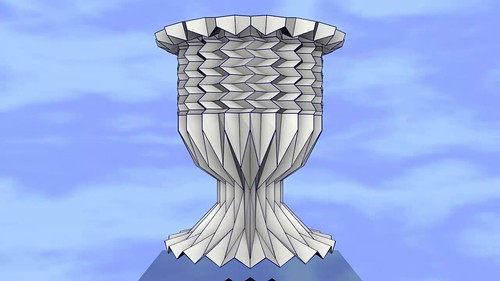
Como consejo personal y basado en mi poca experiencia recomiendo que si se trata de plegar patrones extensos trate de mantener esta forma de acordeón, alternando los pliegues en cada etapa del proceso de plegado, el cual debe realizarse por secciones diagonales.


Waterbomb Of Polyhedral Surface Consists Of Regular Squares.


Waterbomb base pattern is combined with a series of regular squares, creating a flexible and curved three-dimensional model. If the pattern length increases, the curved surface increases

Waterbomb classical Base

Waterbomb classical base, combined with a series of regular square


Regular square waterbomb tessellation in fully collapsed and expanded, curved.
Iso-area square waterbomb tessellation in fully collapsed and expanded, flat..

As a result of residual stresses in the crevices, Waterbomb tessellation with regular square when folded acquires a cylindrical shape. On the axes that have little energy of folding. The auto-tension makes bistable in two orthogonal directions
For best results use a relatively stiff paper. Below is a grid of 8 x 8 at the end will show a grid of 16 * 16.


You must prepare the paper, all the valley bend folds as shows the pattern of folding, this represents the base Waterbomb. The best way is to use the back side paper and then in front side create the mountain folds.
Start at the back of the paper by one corner and follow the collapse along the new fold

It looks slightly bending the folds, so it acquires a slight three-dimensional shape.


Back to the corners and start to collapse Waterbomb bases, together with more force. This action required maintains the sections folded together, while it is folding the rest.


Place the model tessellation, on a flat surface. Apply voltage to reduce the curve. Hold paper the extremes, and push to put together the pattern. Pinch the pleats vertical one by one, to reinforce the folds already prepared, and give shape memory to paper.

You can use paper clips or other suitable clamps to hold the folding pattern in the process.


As personal advice based on my limited experience, I recommend that if you want to bend large patterns try to keep this form of accordion folds. Alternating the folds in each stage of the folding process, which must be worked by diagonal sections.

Tessellation Cup Of Width Goblet / Teselacion Copa De Caliz Ancho

TESELACIÓN COPA DE CÁLIZ ANCHO / TESSELLATION CUP OF WIDTH GOBLET  - 3

Teselación Copa De Cáliz Ancho / Tessellation Cup Of Width Goblet


This is one of the first models made using the Miura pattern, I decided to publish it before it could damage the actual model. In this type of cup, the cup is wide, the stem is short and is only represented by the union between the top and bottom of the folds, with respect to the foot I think it is very wide. This aspect will improve in the folding of a similar model.

Este es uno de los primero modelos que realice, utilizando el patrón miura, decidí publicarlo antes de que se pueda dañar el modelo real. En este tipo de copa el cáliz es ancho, el tallo es corto y solo esta representado por la unión entre la parte superior e inferior de los pliegues, con respecto al pie considero que es muy ancho. Aspecto que mejorare en el plegado de un modelo similar.

Origami Cup, Horizontal And Vertical Fold / Origami Copa, Doblez Horizontal Y Vertical

ORIGAMI COPA. DOBLEZ HORIZONTAL Y VERTICAL / ORIGAMI CUP. HORIZONTAL AND VERTICAL FOLD - 1

ORIGAMI CUP. HORIZONTAL AND VERTICAL FOLD


Paper Type: Recycling old reports.
Preparation time: Do not take the time.

For this model was used miura pattern around the circle and merged the remaining vertical section with a fold inverted hexagonal accordion with patterns based on a quadrilateral parallelogram and isosceles triangle

Difficulty: The design of the folding pattern was difficult to calculate because you must complete a circle. When folding the paper should be careful not to damage the central part has horizontal folds with vertical folds.


Tipo de papel: Sigo reciclando trabajos de la universidad XD
Tiempo de elaboración: No cronometrado

Para este modelo se utilizo el patrón de celda miura alrededor de un circulo y se fusiono la sección vertical restante con un doblez tipo acordeón de hexágono invertido con patrones basados en un cuadrilátero paralelogramo y triangulo isósceles

Dificultad: El diseño del patrón de pliegue fue difícil de calcular debido a que debe completar una circunferencia. Al momento de plegar el papel se debe tener cuidado de no dañar la parte central que tiene pliegues horizontales con los pliegues verticales.

Origami Florero 3D / Origami Vase 3D

ORIGAMI FLORERO 3D / ORIGAMI VASE 3D - 1
ORIGAMI FLORERO 3D 2


Paper Type: Recycling old reports.

Preparation time: I get tired after the 4th hour. So I decided to finish it slowly, working 2 hours per day. (Some calculations required about 9 hours straight)


At the top: miura pattern.

At the bottom: inverted hexagonal pattern

On the central: modified crease pattern Waterbomb.


Tipo de Papel: Reciclando informes viejos.

Tiempo de elaboración: me canse después de la 4ta hora. Entonces decidí terminarlo despacio, trabajando 2 horas por día. (Aproximadamente calculo que se requieren unas 9 horas seguidas)


En la parte superior: patrón miura.

En la parte inferior: patrón hexagonal invertido

En la parte central: patrón modificado de waterbomb

martes, 8 de noviembre de 2011

Waterbomb Pattern Sequence

This design consists of a repetitive series of polyhedral surface Waterbomb pattern, one of the most recognizable folds in origami that is based on the use of tessellations.


The canvas, however, does not begin with a square, starting with a ratio of 2:1. For material to use, all depends on the role they want and their preferences. But keep in mind that a heavy paper Might offer too much rigidity and a very thin paper Might not resist the folding process, I recommend, bond paper of 80 grams. These bases Waterbomb allow repeat to close a cylindrical shape is maintained by applying pressure to the sides. In its natural state the folds form a sphere. If pressure is applied on the top and bottom, the structure collapses on itself, creating a donut-shaped


Below is a diagram of the folding pattern. The red line indicates a fold of the valley, the blue line indicates a fold of the mountain, and the black line indicates a cutting line. Although it is difficult to see in the diagram, each square with a red X is the basis Waterbomb. Each row is offset by an odd row, through Waterbomb pattern. For example, if the paper size is 20 inches by 10 inches, the top row has 20 bases Waterbomb next to each other. This means that each pattern is 1 inch by 1 inch. The second row is moved horizontally 0.5 inches. This pattern is repeated until the end of the 10 inches. It is preferable to fold this model row by row, as each folding affects the next.


As personal advice based on my limited experience I recommend that you try to keep this kind of accordion, alternating the folds in each stage of the folding process.


Secuencia Del Patrón Waterbomb

Este diseño se compone de una serie repetitiva del patrón Waterbomb de superficie poliedrica, uno de los pliegues mas reconocidos en el origami que se basa en el uso de teselados.


La hoja de papel, sin embargo, no comienza con un cuadrado, inicia con una proporción de 2:1. En cuanto al material a usar, todo depende del papel que quieran y sus preferencias. Pero se debe tener presente que un papel grueso puede ofrecer demasiada rigidez y un papel muy delgado puede no resistir el proceso de plegado, yo recomiendo, papel bond de 80 gramos. Estas bases Waterbomb permiten repetir el patrón hasta cerrar una forma cilíndrica que se mantiene al aplicar presión a los lados, en su estado natural forma una esfera. Si la presión se aplica en la parte superior e inferior, la estructura se colapsa sobre si misma, creando una forma de rosquilla


A continuación se muestra un diagrama del patrón de plegado. La línea roja indica un doblez del valle, la línea azul indica un doblez de la montaña, y la línea de color negro indica una línea de corte. Aunque es difícil de ver en el diagrama, cada cuadrado con una X Roja es la base waterbomb. Cada fila se compensa con una fila impar, por medio del patrón waterbomb. Por ejemplo, si el tamaño del papel es de 20 pulgadas por 10 pulgadas, la fila superior tiene 20 bases waterbomb una al lado de otra. Esto hace que cada patrón sea de 1 pulgada por 1 pulgada. La segunda fila se desplaza horizontalmente 0.5 pulgadas. Este patrón se repite hasta terminar las 10 pulgadas. Es preferible plegar este modelo fila por fila ya que cada doblez afecta al siguiente.


Como consejo personal y basado en mi poca experiencia recomiendo que se trate de mantener siempre esta forma de acordeón, alternando los pliegues en cada etapa del proceso de plegado.


miércoles, 2 de noviembre de 2011

Paper Fold Cup Tessellation / Origami Copa Teselación

ORIGAMI CUP TESSELLATION / ORIGAMI COPA TESELACIÓN  - 1 ORIGAMI CUP TESSELLATION 3D 1

My first video on the art of paper folding. Cup 3D. Inspired in the use of origami tessellation

Fold Type: MIURA

Paper Type: Bond 80 grams


Mi primer video en el arte de la papiroflexia. Copa 3D. Inspirado en el uso de origami de teselación

Tipo de Pliegue: MIURA

Tipo de papel: Bond 80 gramos